
在上一个教程中,我们运行了实际的预先训练的对象检测,但是我们的代码很杂乱,并且检测工作非常慢。在这一部分中,我们将清理杂乱的代码并进行一些代码修改,以便我们的对象检测可以更快地工作。
起初,我检查了所有代码并删除了所有不必要的代码,所以与其使用Object_Detect_Tutorial_grabcreen.py,不如使用object_detection_tutorial_grabscreen_pretty.py,这样更容易理解它是如何工作的。
清理代码后,我开始对其进行一些更改。我主要删除了def run_inference_for_Single_image(image,graph):函数,并在主While循环中添加了所需的行,这改变了目标检测速度。这里不详细介绍的是代码,您可以复制并测试(您可以在GitHub页面找到它):GitHub
# Welcome to the object detection tutorial!

# # Imports
os.environ['CUDA_VISIBLE_DEVICES'] = '-1'

# title of our window
title = "FPS benchmark"
# set start time to current time
start_time = time.time()
# displays the frame rate every 2 second
display_time = 2
# Set primarry FPS to 0
fps = 0
# Load mss library as sct
sct = mss.mss()
# Set monitor size to capture to MSS
monitor = {"top": 40, "left": 0, "width": 800, "height": 640}

# ## Env setup

# # Model preparation
PATH_TO_FROZEN_GRAPH = 'frozen_inference_graph.pb'
# List of the strings that is used to add correct label for each box.
PATH_TO_LABELS = 'mscoco_label_map.pbtxt'
NUM_CLASSES = 80

# ## Load a (frozen) Tensorflow model into memory.
label_map = label_map_util.load_labelmap(PATH_TO_LABELS)
categories = label_map_util.convert_label_map_to_categories(
    label_map, max_num_classes=NUM_CLASSES, use_display_name=True)
category_index = label_map_util.create_category_index(categories)

detection_graph = tf.Graph()
with detection_graph.as_default():
    od_graph_def = tf.GraphDef()
    with tf.gfile.GFile(PATH_TO_FROZEN_GRAPH, 'rb') as fid:
        serialized_graph = fid.read()
        od_graph_def.ParseFromString(serialized_graph)
        tf.import_graph_def(od_graph_def, name='')

# # Detection
with detection_graph.as_default():
    with tf.Session(graph=detection_graph) as sess:
        while True:
            # Get raw pixels from the screen, save it to a Numpy array
            image_np = np.array(sct.grab(monitor))
            # To get real color we do this:
            image_np = cv2.cvtColor(image_np, cv2.COLOR_BGR2RGB)
            # Expand dimensions since the model expects images to have shape: [1, None, None, 3]
            image_np_expanded = np.expand_dims(image_np, axis=0)
            # Actual detection.
            image_tensor = detection_graph.get_tensor_by_name('image_tensor:0')
            boxes = detection_graph.get_tensor_by_name('detection_boxes:0')
            scores = detection_graph.get_tensor_by_name('detection_scores:0')
            classes = detection_graph.get_tensor_by_name('detection_classes:0')
            num_detections = detection_graph.get_tensor_by_name(
                'num_detections:0')
            # Visualization of the results of a detection.
            (boxes, scores, classes, num_detections) = sess.run(
                [boxes, scores, classes, num_detections],
                feed_dict={image_tensor: image_np_expanded})
            vis_util.visualize_boxes_and_labels_on_image_array(
                image_np,
                np.squeeze(boxes),
                np.squeeze(classes).astype(np.int32),
                np.squeeze(scores),
                category_index,
                use_normalized_coordinates=True,
                line_thickness=3)
            # Show image with detection
            cv2.imshow(title, cv2.cvtColor(image_np, cv2.COLOR_BGR2RGB))
            # Bellow we calculate our FPS
            fps += 1
            TIME = time.time() - start_time
            if (TIME) >= display_time:
                print("FPS: ", fps / (TIME))
                fps = 0
                start_time = time.time()
            # Press "q" to quit
            if cv2.waitKey(25) & 0xFF == ord("q"):
                cv2.destroyAllWindows()
                break
与上一教程一样,我们正在测试它的工作速度。我们用相同的物体数量拍摄相同的照片来比较我们在第三个教程部分中得到的结果。在下图中,您可以看到与之前相比有很大的不同,平均为1 FPS。如果你在GPU上运行它,你会得到5到10倍的提升。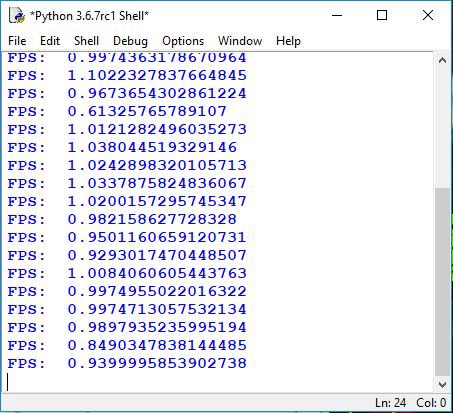
这是我们的照片,上面有探测到的物体: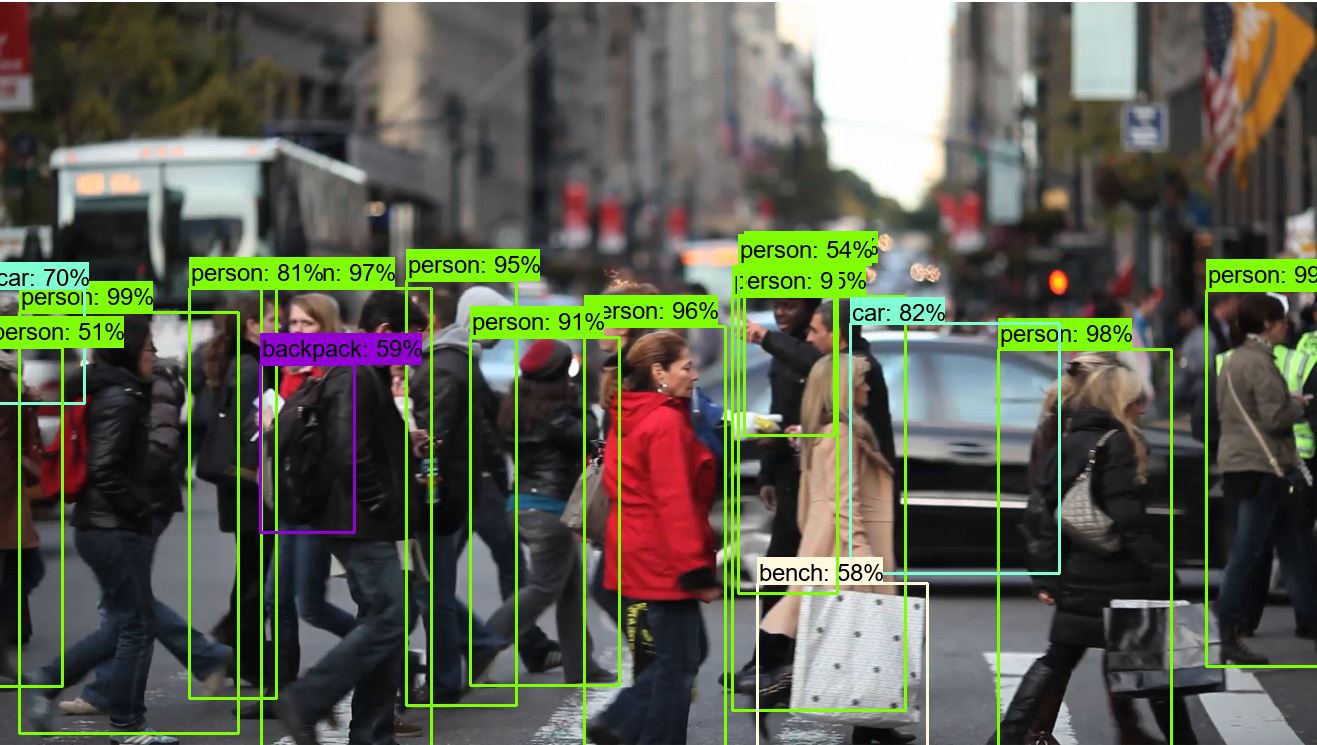
在本教程中,我们使用的是第3部分教程中的代码。在这里,我们清理了代码,并且大部分时间我们使用的是WHILE循环。我们现在以最快的速度开始工作。下一步,我们的目标是制作我们的定制训练数据。
最初发表于https://pylessons.com/Tensorflow-object-detection-merged-grab-screen-fasterhttps://pylessons.com/Tensorflow-object-detection-merged-grab-screen-faster
原创文章,作者:fendouai,如若转载,请注明出处:https://panchuang.net/2021/07/07/%e7%bb%93%e5%90%88%e6%8a%93%e5%b1%8f%e7%9a%84tensorflow%e5%bf%ab%e9%80%9f%e7%9b%ae%e6%a0%87%e6%a3%80%e6%b5%8b/
