图像风格迁移实战(附Python实战)
作者 | 小韩
编辑 | 安可
出品 | 磐创AI技术团队
在今天的文章中,我们会建立一个很棒的风格迁移网络。为了做到这一点,我们需要深入地了解 CNN 和卷积层的工作原理。在文章结束时,你将会创建一个风格迁移网络,这个网络能够在保留原始图像的同时将新样式应用到它上面。

风格迁移
在开始之前,先明确一下我们的目标。
我们将风格迁移定义为改变图像风格同时保留它的内容的过程。
给定一张输入图像和样式图像,我们就可以得到既有原始内容又有新样式的输出图像。在 Leon A. Gaty 的论文 A Neural Algorithm of Artistic Style 中有所描述。
输入图像 + 样式图像 -> 输出图像(风格化)
工作方式
-
准备输入图像和风格图像并将它们调整为相同的大小。
-
加载预训练的卷积神经网络(VGG16)。
-
区分负责样式的卷积(基本形状,颜色等)和负责内容的卷积(特定于图像的特征),将卷积分开可以单独地处理内容和样式。
-
优化问题,也就是最小化:
-
内容损失(输入和输出图像之间的距离 – 尽力保留内容)
-
风格损失(风格和输出图像之间的距离 – 尽力应用新风格)
-
总变差损失(正则化 – 对输出图像进行去噪的空间平滑度)
-
最后设置梯度并使用 L-BFGS 算法进行优化。
实现
输入
1# 旧金山
2san_francisco_image_path = "https://www.economist.com/sites/default/files/images/print-edition/20180602_USP001_0.jpg"
3
4# 输入可视化
5input_image = Image.open(BytesIO(requests.get(san_francisco_image_path).content))
6input_image = input_image.resize((IMAGE_WIDTH, IMAGE_HEIGHT))
7input_image.save(input_image_path)
8input_image
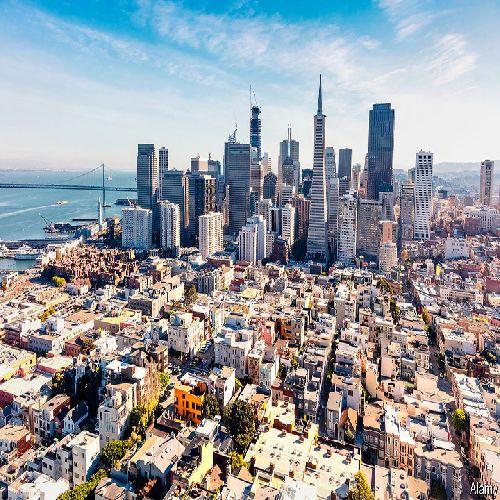
这就是旧金山的天际线
风格
然后定义一个风格图像。
1# Tytus Brzozowski
2tytus_image_path = "http://meetingbenches.com/wp-content/flagallery/tytus-brzozowski-polish-architect-and-watercolorist-a-fairy-tale-in-warsaw/tytus_brzozowski_13.jpg"
3
4# 风格图像可视化
5style_image = Image.open(BytesIO(requests.get(tytus_image_path).content))
6style_image = style_image.resize((IMAGE_WIDTH, IMAGE_HEIGHT))
7style_image.save(style_image_path)
8style_image
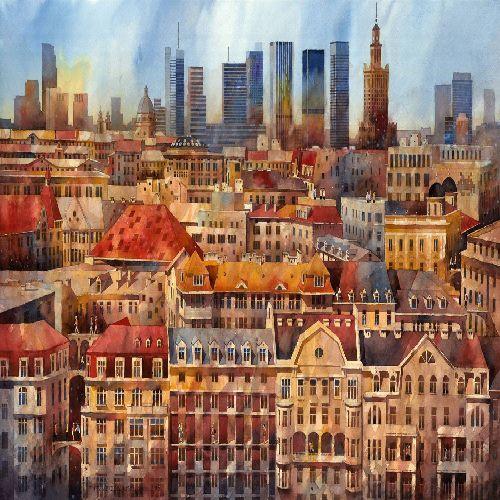
这是Tytus Brzozowski的景色。
预处理
接下来对两个图像调整大小和均值归一化。
 1input_image_array = np.asarray(input_image, dtype="float32")
 2input_image_array = np.expand_dims(input_image_array, axis=0)
 3input_image_array[:, :, :, 0] -= IMAGENET_MEAN_RGB_VALUES[2]
 4input_image_array[:, :, :, 1] -= IMAGENET_MEAN_RGB_VALUES[1]
 5input_image_array[:, :, :, 2] -= IMAGENET_MEAN_RGB_VALUES[0]
 6input_image_array = input_image_array[:, :, :, ::-1]
 7
 8style_image_array = np.asarray(style_image, dtype="float32")
 9style_image_array = np.expand_dims(style_image_array, axis=0)
10style_image_array[:, :, :, 0] -= IMAGENET_MEAN_RGB_VALUES[2]
11style_image_array[:, :, :, 1] -= IMAGENET_MEAN_RGB_VALUES[1]
12style_image_array[:, :, :, 2] -= IMAGENET_MEAN_RGB_VALUES[0]
13style_image_array = style_image_array[:, :, :, ::-1]
CNN模型
随着图像准备完成,我们可以继续建立 CNN 模型。
1# 模型
2input_image = backend.variable(input_image_array)
3style_image = backend.variable(style_image_array)
4combination_image = backend.placeholder((1, IMAGE_HEIGHT, IMAGE_SIZE, 3))
5
6input_tensor = backend.concatenate([input_image,style_image,combination_image], axis=0)
7model = VGG16(input_tensor=input_tensor, include_top=False)
在这个项目中,我们将使用预先训练的VGG16模型,如下所示。
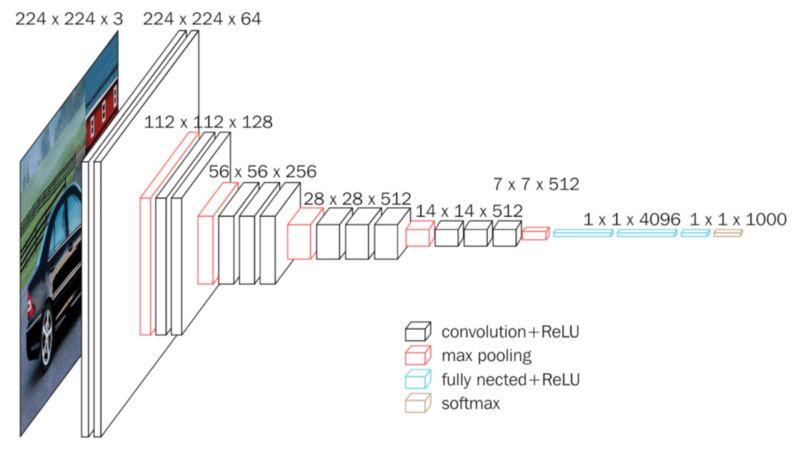
我们不使用全连接(蓝色)和 softmax (黄色),因为这里不需要分类器。我们仅使用特征提取器,即卷积(黑色)和最大池(红色)。
下面是在ImageNet数据集上训练的 VGG16 的图像特征。
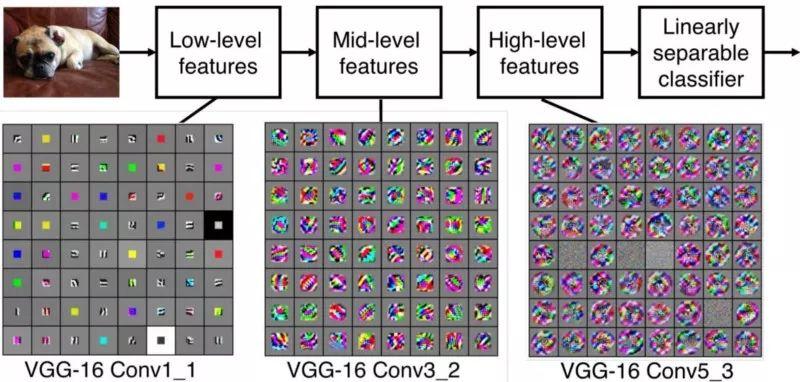
我们不会可视化每个CNN,对于内容,我们应该选择 block2_conv2 ,样式应该选择 [block1_conv2,block2_conv2,block3_conv3,block4_conv3,block5_conv3]。
虽然这种组合被证明是有效的,但也可以尝试不同的卷积层。
内容损失
定义了CNN模型后,还需要定义一个内容损失函数。为了保留图像原始内容,我们将最小化输入图像和输出图像之间的距离。
 1def content_loss(content, combination):
 2    return backend.sum(backend.square(combination - content))
 3
 4layers = dict([(layer.name, layer.output) for layer in model.layers])
 5
 6content_layer = "block2_conv2"
 7layer_features = layers[content_layer]
 8content_image_features = layer_features[0, :, :, :]
 9combination_features = layer_features[2, :, :, :]
10
11loss = backend.variable(0.)
12loss += CONTENT_WEIGHT * content_loss(content_image_features,
13                                      combination_features)
样式损失
与内容损失类似,样式损失也被定义为两个图像之间的距离。但是,为了应用新风格,样式损失被定义为风格图像和输出图像之间的距离。
 1def gram_matrix(x):
 2    features = backend.batch_flatten(backend.permute_dimensions(x, (2, 0, 1)))
 3    gram = backend.dot(features, backend.transpose(features))
 4    return gram
 5
 6def compute_style_loss(style, combination):
 7    style = gram_matrix(style)
 8    combination = gram_matrix(combination)
 9    size = IMAGE_HEIGHT * IMAGE_WIDTH
10    return backend.sum(backend.square(style - combination)) / (4. * (CHANNELS ** 2) * (size ** 2))
11
12style_layers = ["block1_conv2", "block2_conv2", "block3_conv3", "block4_conv3", "block5_conv3"]
13for layer_name in style_layers:
14    layer_features = layers[layer_name]
15    style_features = layer_features[1, :, :, :]
16    combination_features = layer_features[2, :, :, :]
17    style_loss = compute_style_loss(style_features, combination_features)
18    loss += (STYLE_WEIGHT / len(style_layers)) * style_loss
总变化损失
最后定义一个总变化损失,它作为一个空间平滑器来规范图像并防止去噪。
1def total_variation_loss(x):
2    a = backend.square(x[:, :IMAGE_HEIGHT-1, :IMAGE_WIDTH-1, :] - x[:, 1:, :IMAGE_WIDTH-1, :])
3    b = backend.square(x[:, :IMAGE_HEIGHT-1, :IMAGE_WIDTH-1, :] - x[:, :IMAGE_HEIGHT-1, 1:, :])
4    return backend.sum(backend.pow(a + b, TOTAL_VARIATION_LOSS_FACTOR))
5
6loss += TOTAL_VARIATION_WEIGHT * total_variation_loss(combination_image)
优化 – 损失和梯度
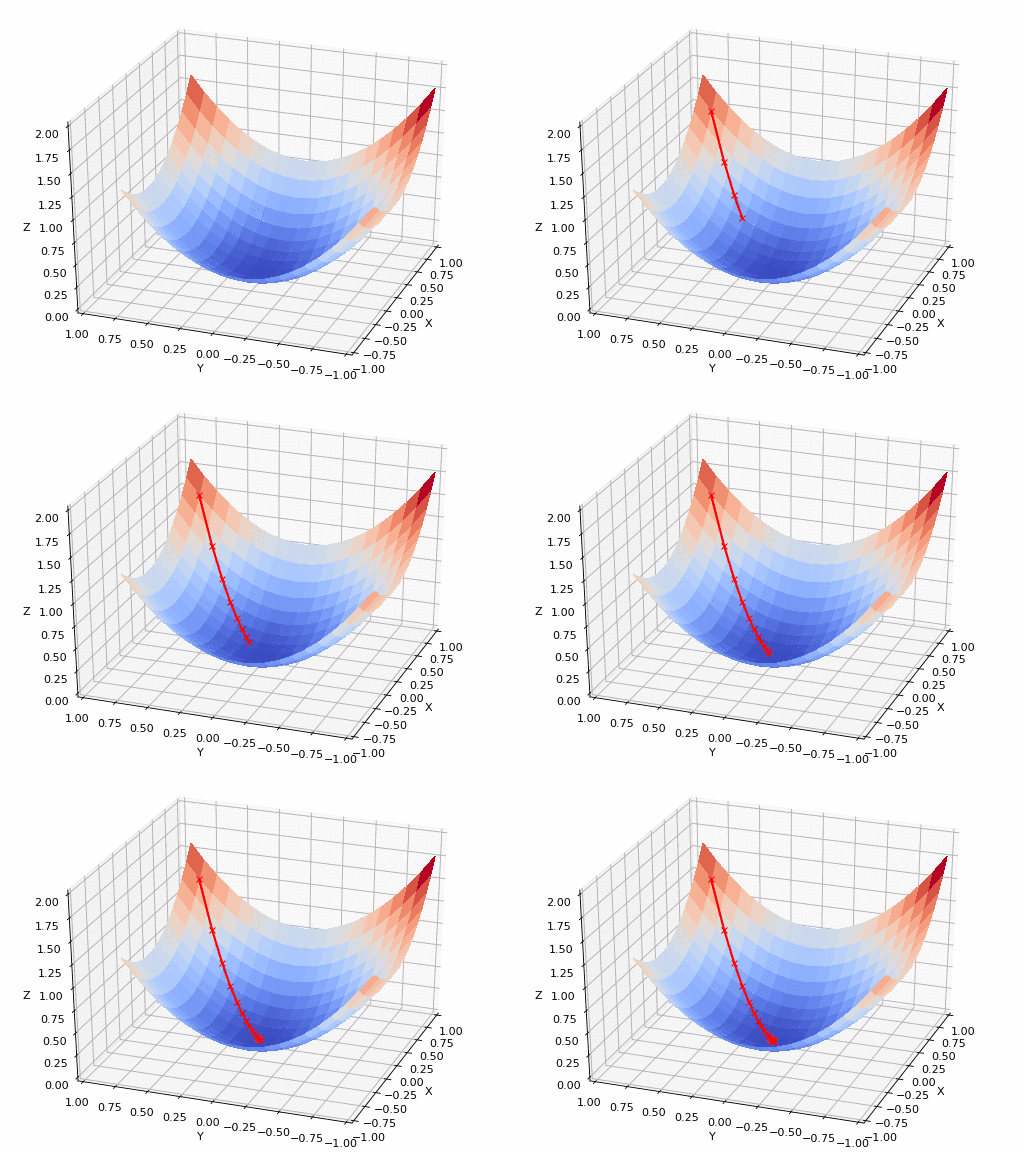
设置了内容损失,样式损失和总变化损失之后,就可以将风格转移过程转化为优化问题,最大限度地减少全局损失(内容,风格和总变化损失的组合) 。
在每次迭代中,我们将创建一个输出图像,以便最小化相应像素输出和输入/样式之间的距离(差异)。
 1outputs = [loss]
 2outputs += backend.gradients(loss, combination_image)
 3
 4def evaluate_loss_and_gradients(x):
 5    x = x.reshape((1, IMAGE_HEIGHT, IMAGE_WIDTH, CHANNELS))
 6    outs = backend.function([combination_image], outputs)([x])
 7    loss = outs[0]
 8    gradients = outs[1].flatten().astype("float64")
 9    return loss, gradients
10
11class Evaluator:
12
13    def loss(self, x):
14        loss, gradients = evaluate_loss_and_gradients(x)
15        self._gradients = gradients
16        return loss
17
18    def gradients(self, x):
19        return self._gradients
20
21evaluator = Evaluator()
结果
最后,使用 L-BFGS 算法进行优化并可视化结果。
 1x = np.random.uniform(0, 255, (1, IMAGE_HEIGHT, IMAGE_WIDTH, 3)) - 128.
 2
 3for i in range(ITERATIONS):
 4    x, loss, info = fmin_l_bfgs_b(evaluator.loss, x.flatten(), fprime=evaluator.gradients, maxfun=20)
 5    print("Iteration %d completed with loss %d" % (i, loss))
 6
 7x = x.reshape((IMAGE_HEIGHT, IMAGE_WIDTH, CHANNELS))
 8x = x[:, :, ::-1]
 9x[:, :, 0] += IMAGENET_MEAN_RGB_VALUES[2]
10x[:, :, 1] += IMAGENET_MEAN_RGB_VALUES[1]
11x[:, :, 2] += IMAGENET_MEAN_RGB_VALUES[0]
12x = np.clip(x, 0, 255).astype("uint8")
13output_image = Image.fromarray(x)
14output_image.save(output_image_path)
15output_image

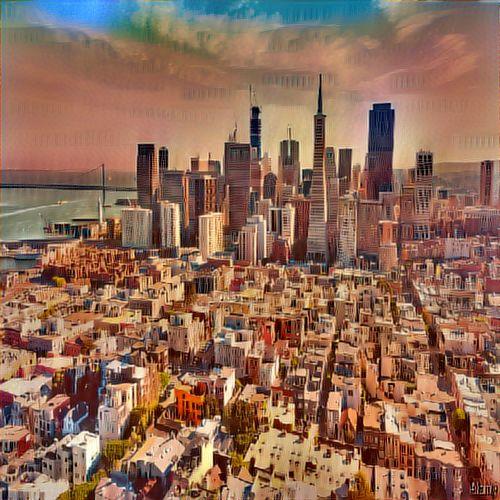
将输入图像,样式图像和输出图像放在一起。

效果还是非常不错的。
我们可以清楚地看到,既保留了输入图像(旧金山天际线)的原始内容,也成功地将新样式(Tytus Brzozowski)应用到了新的输出图像。
其他一些例子


后台回复关键字“风格迁移”可见Github链接。
你也许还想看:
● 手把手带你实现 | 室内用户移动预测(附python代码)
欢迎扫码关注:
原创文章,作者:fendouai,如若转载,请注明出处:https://panchuang.net/2019/01/17/cf4c6b6e7f/


