
作者|DR. VAIBHAV KUMAR
编译|VK
来源|Analytics In Diamag
人工神经网络有许多流行的变体,可用于有监督和无监督学习问题。自编码器也是神经网络的一个变种,主要用于无监督学习问题。
当它们在体系结构中有多个隐藏层时,它们被称为深度自编码器。这些模型可以应用于包括图像重建在内的各种应用。
在图像重建中,他们学习输入图像模式的表示,并重建与原始输入图像模式匹配的新图像。图像重建有许多重要的应用,特别是在医学领域,需要从现有的不完整或有噪声的图像中提取解码后的无噪声图像。
在本文中,我们将演示在PyTorch中实现用于重建图像的深度自编码器。该深度学习模型将以MNIST手写数字为训练对象,在学习输入图像的表示后重建数字图像。

自编码器
自编码器是人工神经网络的变体,通常用于以无监督的方式学习有效的数据编码。
他们通常在一个表示学习方案中学习,在那里他们学习一组数据的编码。网络通过学习输入数据的表示,以非常相似的方式重建输入数据。自编码器的基本结构如下所示。
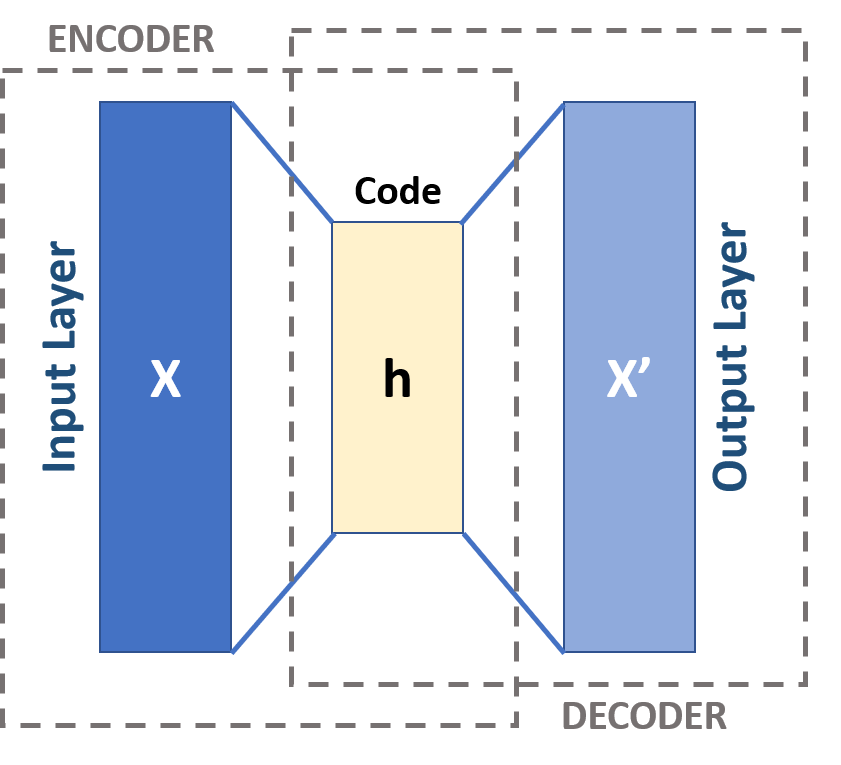
该体系结构通常包括输入层、输出层和连接输入和输出层的一个或多个隐藏层。输出层与输入层具有相同数量的节点,因为它要重新构造输入。
在它的一般形式中,只有一个隐藏层,但在深度自动编码器的情况下,有多个隐藏层。这种深度的增加减少了表示某些函数的计算成本,也减少了学习某些函数所需的训练数据量。其应用领域包括异常检测、图像处理、信息检索、药物发现等。
在PyTorch中实现深度自编码器
首先,我们将导入所有必需的库。
import os
import torch
import torchvision
import torch.nn as nn
import torchvision.transforms as transforms
import torch.optim as optim
import matplotlib.pyplot as plt
import torch.nn.functional as F
from torchvision import datasets
from torch.utils.data import DataLoader
from torchvision.utils import save_image
from PIL import Image
现在,我们将定义超参数的值。
Epochs = 100
Lr_Rate = 1e-3
Batch_Size = 128
以下函数将用于PyTorch模型所需的图像转换。
transform = transforms.Compose([
    transforms.ToTensor(),
    transforms.Normalize((0.5,), (0.5,))
])
使用下面的代码片段,我们将下载MNIST手写数字数据集,并为进一步处理做好准备。
train_set = datasets.MNIST(root='./data', train=True, download=True, transform=transform)
test_set = datasets.MNIST(root='./data', train=False, download=True, transform=transform)

train_loader = DataLoader(train_set, Batch_Size=Batch_Size, shuffle=True)
test_loader = DataLoader(test_set, Batch_Size=Batch_Size, shuffle=True)
让我们看看关于训练数据及其类的一些信息。
print(train_set)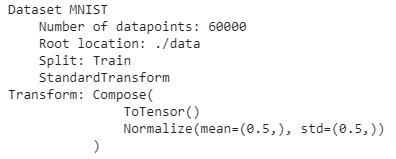
print(train_set.classes)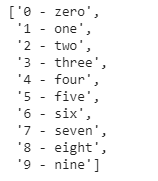
在下一步中,我们将定义用于定义模型的Autoencoder类。
class Autoencoder(nn.Module):
    def __init__(self):
        super(Autoencoder, self).__init__()

        #编码器
        self.enc1 = nn.Linear(in_features=784, out_features=256) # Input image (28*28 = 784)
        self.enc2 = nn.Linear(in_features=256, out_features=128)
        self.enc3 = nn.Linear(in_features=128, out_features=64)
        self.enc4 = nn.Linear(in_features=64, out_features=32)
        self.enc5 = nn.Linear(in_features=32, out_features=16)

        #解码器
        self.dec1 = nn.Linear(in_features=16, out_features=32)
        self.dec2 = nn.Linear(in_features=32, out_features=64)
        self.dec3 = nn.Linear(in_features=64, out_features=128)
        self.dec4 = nn.Linear(in_features=128, out_features=256)
        self.dec5 = nn.Linear(in_features=256, out_features=784) # Output image (28*28 = 784)

    def forward(self, x):
        x = F.relu(self.enc1(x))
        x = F.relu(self.enc2(x))
        x = F.relu(self.enc3(x))
        x = F.relu(self.enc4(x))
        x = F.relu(self.enc5(x))

        x = F.relu(self.dec1(x))
        x = F.relu(self.dec2(x))
        x = F.relu(self.dec3(x))
        x = F.relu(self.dec4(x))
        x = F.relu(self.dec5(x))

        return x
现在,我们将创建Autoencoder模型作为上面定义的Autoencoder类的一个对象。
model = Autoencoder()
print(model)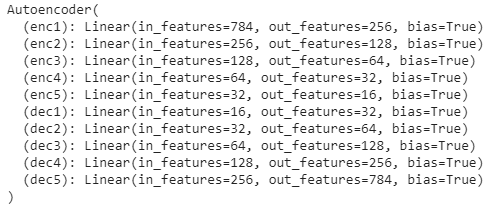
现在,我们将定义损失函数和优化方法。
criterion = nn.MSELoss()
optimizer = optim.Adam(net.parameters(), lr=Lr_Rate)
以下函数将启用CUDA环境。
def get_device():
    if torch.cuda.is_available():
        device = 'cuda:0'
    else:
        device = 'cpu'
    return device
下面的函数将创建一个目录来保存结果。
def make_dir():
    image_dir = 'MNIST_Out_Images'
    if not os.path.exists(image_dir):
        os.makedirs(image_dir)
使用下面的函数,我们将保存模型生成的重建图像。
def save_decod_img(img, epoch):
    img = img.view(img.size(0), 1, 28, 28)
    save_image(img, './MNIST_Out_Images/Autoencoder_image{}.png'.format(epoch))
将调用下面的函数来训练模型。
def training(model, train_loader, Epochs):
    train_loss = []
    for epoch in range(Epochs):
        running_loss = 0.0
        for data in train_loader:
            img, _ = data
            img = img.to(device)
            img = img.view(img.size(0), -1)
            optimizer.zero_grad()
            outputs = model(img)
            loss = criterion(outputs, img)
            loss.backward()
            optimizer.step()
            running_loss += loss.item()

        loss = running_loss / len(train_loader)
        train_loss.append(loss)
        print('Epoch {} of {}, Train Loss: {:.3f}'.format(
            epoch+1, Epochs, loss))

        if epoch % 5 == 0:
            save_decod_img(outputs.cpu().data, epoch)

    return train_loss
以下函数将对训练后的模型进行图像重建测试。
def test_image_reconstruct(model, test_loader):
     for batch in test_loader:
        img, _ = batch
        img = img.to(device)
        img = img.view(img.size(0), -1)
        outputs = model(img)
        outputs = outputs.view(outputs.size(0), 1, 28, 28).cpu().data
        save_image(outputs, 'MNIST_reconstruction.png')
        break
在训练之前,模型将被推送到CUDA环境中,并使用上面定义的函数创建目录来保存结果图像。
device = get_device()
model.to(device)
make_dir()
现在,将对模型进行训练。
train_loss = training(model, train_loader, Epochs)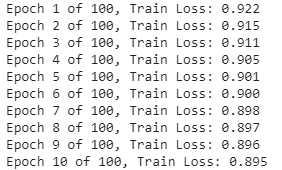

训练成功后,我们将在训练中可视化损失。
plt.figure()
plt.plot(train_loss)
plt.title('Train Loss')
plt.xlabel('Epochs')
plt.ylabel('Loss')
plt.savefig('deep_ae_mnist_loss.png')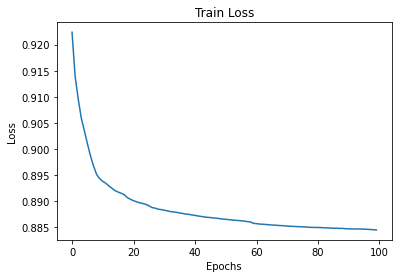
我们将可视化训练期间保存的一些图像。
Image.open('/content/MNIST_Out_Images/Autoencoder_image0.png')
Image.open('/content/MNIST_Out_Images/Autoencoder_image50.png')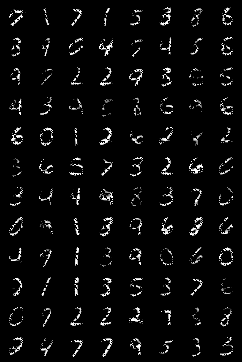
Image.open('/content/MNIST_Out_Images/Autoencoder_image95.png')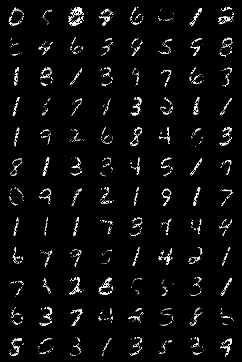
在最后一步,我们将测试我们的自编码器模型来重建图像。
test_image_reconstruct(model, testloader)

Image.open('/content/MNIST_reconstruction.png')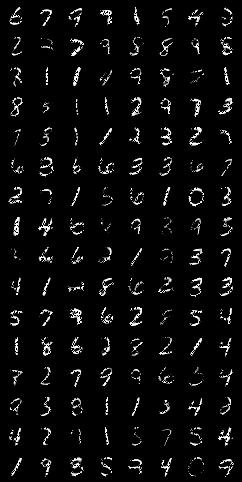
所以,我们可以看到,自训练过程开始时,自编码器模型就开始重建图像。第一个epoch以后,重建的质量不是很好,直到50 epoch后才得到改进。
经过完整的训练,我们可以看到,在95 epoch以后生成的图像和测试中,它可以构造出与原始输入图像非常匹配的图像。
我们根据loss值,可以知道epoch可以设置100或200。
经过长时间的训练,有望获得更清晰的重建图像。然而,通过这个演示,我们可以理解如何在PyTorch中实现用于图像重建的深度自编码器。
参考文献:
- Sovit Ranjan Rath, “Implementing Deep Autoencoder in PyTorch”
- Abien Fred Agarap, “Implementing an Autoencoder in PyTorch”
- Reyhane Askari, “Auto Encoders”
欢迎关注磐创AI博客站:
http://panchuang.net/
sklearn机器学习中文官方文档:
http://sklearn123.com/
欢迎关注磐创博客资源汇总站:
http://docs.panchuang.net/
原创文章,作者:磐石,如若转载,请注明出处:https://panchuang.net/2020/09/01/%e5%9c%a8pytorch%e4%b8%ad%e4%bd%bf%e7%94%a8%e6%b7%b1%e5%ba%a6%e8%87%aa%e7%bc%96%e7%a0%81%e5%99%a8%e5%ae%9e%e7%8e%b0%e5%9b%be%e5%83%8f%e9%87%8d%e5%bb%ba/
