作者 | 荔枝boy
编辑 | 安可
出品 | 磐创AI技术团队
【前言】:你已经了解了如何定义神经网络,计算loss值和网络里权重的更新。现在你也许会想数据怎么样?
目录:
一.数据
二.训练一个图像分类器
1. 使用torchvision加载并且归一化CIFAR10的训练和测试数据集
2. 定义一个卷积神经网络
3. 定义一个损失函数
4. 在训练样本数据上训练网络
5. 在测试样本数据上测试网络
三.在GPU上训练
四.在多个GPU上训练
五.还可以学哪些?
一、 数据
通常来说,当你处理图像,文本,语音或者视频数据时,你可以使用标准python包将数据加载成numpy数组格式,然后将这个数组转换成torch.*Tensor
-
对于图像,可以用Pillow,OpenCV
-
对于语音,可以用scipy,librosa
-
对于文本,可以直接用Python或Cython基础数据加载模块,或者用NLTK和SpaCy
特别是对于视觉,我们已经创建了一个叫做totchvision的包,该包含有支持加载类似Imagenet,CIFAR10,MNIST等公共数据集的数据加载模块torchvision.datasets和支持加载图像数据数据转换模块torch.utils.data.DataLoader。
这提供了极大的便利,并且避免了编写“样板代码”。
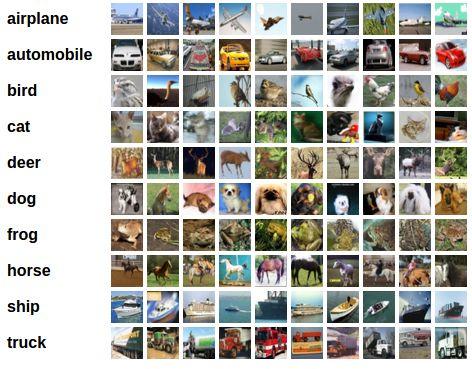
对于本教程,我们将使用CIFAR10数据集,它包含十个类别:‘airplane’, ‘automobile’, ‘bird’, ‘cat’, ‘deer’, ‘dog’, ‘frog’, ‘horse’, ‘ship’, ‘truck’。CIFAR-10中的图像尺寸为3*32*32,也就是RGB的3层颜色通道,每层通道内的尺寸为32*32。

图片一 cifar10
二、 训练一个图像分类器
我们将按次序的做如下几步:
1. 使用torchvision加载并且归一化CIFAR10的训练和测试数据集
2. 定义一个卷积神经网络
3. 定义一个损失函数
4. 在训练样本数据上训练网络
5. 在测试样本数据上测试网络
1. 加载并归一化CIFAR10
使用torchvision,用它来加载CIFAR10数据非常简单
import torch
import torchvision
import torchvision.transformsastransforms
torchvision数据集的输出是范围在[0,1]之间的PILImage,我们将他们转换成归一化范围为[-1,1]之间的张量Tensors。
transform = transforms.Compose(
    [transforms.ToTensor(),
     transforms.Normalize((0.5, 0.5, 0.5), (0.5, 0.5, 0.5))])

trainset = torchvision.datasets.CIFAR10(root='./data', train=True,
                         download=True,transform=transform)

trainloader = torch.utils.data.DataLoader(trainset, batch_size=4,
                                shuffle=True, num_workers=2)

testset = torchvision.datasets.CIFAR10(root='./data', train=False,
                        download=True, transform=transform)

testloader = torch.utils.data.DataLoader(testset, batch_size=4,
                               shuffle=False, num_workers=2)

classes = ('plane', 'car', 'bird', 'cat', 'deer', 'dog', 'frog', 'horse', 'ship', 'truck')
输出:
Downloading https://www.cs.toronto.edu/~kriz/cifar-10-python.tar.gz to ./data/cifar-10-python.tar.gz Files already downloaded and verified
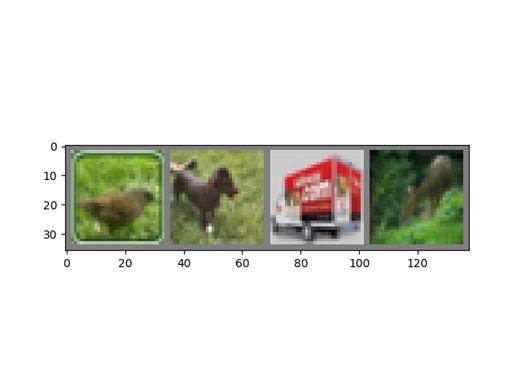
让我们来展示其中的一些训练图片。
import matplotlib.pyplot as plt
import numpy as np

# 图像显示函数
defimshow(img):
    img = img /2+0.5     # 非标准的(unnormalized)
    npimg = img.numpy()
    plt.imshow(np.transpose(npimg, (1, 2, 0)))
    plt.show()

# 得到一些随机图像
dataiter =iter(trainloader)images, labels = dataiter.next()

# 显示图像
imshow(torchvision.utils.make_grid(images))

# 打印类标
print(' '.join('%5s'% classes[labels[j]] for j inrange(4)))

图片二
输出:
cat car dog cat2. 定义一个卷积神经网络
在这之前先 从神经网络章节 复制神经网络,并修改它为3通道的图片(在此之前它被定义为1通道)
import torch.nn as nn
import torch.nn.functional as F

classNet(nn.Module):
    def __init__(self):
        super(Net, self).__init__()
        self.conv1 = nn.Conv2d(3, 6, 5)
        self.pool = nn.MaxPool2d(2, 2)
        self.conv2 = nn.Conv2d(6, 16, 5)
        self.fc1 = nn.Linear(16*5*5, 120)
        self.fc2 = nn.Linear(120, 84)
        self.fc3 = nn.Linear(84, 10)

    defforward(self, x):
        x =self.pool(F.relu(self.conv1(x)))
        x =self.pool(F.relu(self.conv2(x)))
        x = x.view(-1, 16*5*5)
        x = F.relu(self.fc1(x))
        x = F.relu(self.fc2(x))
        x =self.fc3(x)

        return x

net = Net()
3. 定义一个损失函数和优化器
让我们使用分类交叉熵Cross-Entropy 作损失函数,动量SGD做优化器。
import torch.optim as optim

criterion = nn.CrossEntropyLoss()optimizer = optim.SGD(net.parameters(), lr=0.001, momentum=0.9)
4. 训练网络
这里事情开始变得有趣,我们只需要在数据迭代器上循环传给网络和优化器输入就可以。
for epoch inrange(2):  # 多次循环遍历数据集
    running_loss =0.0
    for i, data inenumerate(trainloader, 0):
        # 获取输入
        inputs, labels = data

        # 参数梯度置零
        optimizer.zero_grad()

        # 前向+ 反向 + 优化
        outputs = net(inputs)
        loss = criterion(outputs, labels)
        loss.backward()
        optimizer.step()

        # 输出统计
running_loss += loss.item()

        if i %2000==1999:    # 每2000 mini-batchs输出一次                                  print('[%d, %5d] loss: %.3f'%
                  (epoch +1, i +1, running_loss /2000))

            running_loss =0.0

print('Finished Training')
输出:
[1,  2000] loss: 2.211
[1,  4000] loss: 1.837
[1,  6000] loss: 1.659
[1,  8000] loss: 1.570
[1, 10000] loss: 1.521
[1, 12000] loss: 1.451
[2,  2000] loss: 1.411
[2,  4000] loss: 1.393
[2,  6000] loss: 1.348
[2,  8000] loss: 1.340
[2, 10000] loss: 1.363
[2, 12000] loss: 1.320

Finished Training
5. 在测试集上测试网络
我们已经通过训练数据集对网络进行了2次训练,但是我们需要检查网络是否已经学到了东西。
我们将用神经网络的输出作为预测的类标来检查网络的预测性能,用样本的真实类标来校对。如果预测是正确的,我们将样本添加到正确预测的列表里。
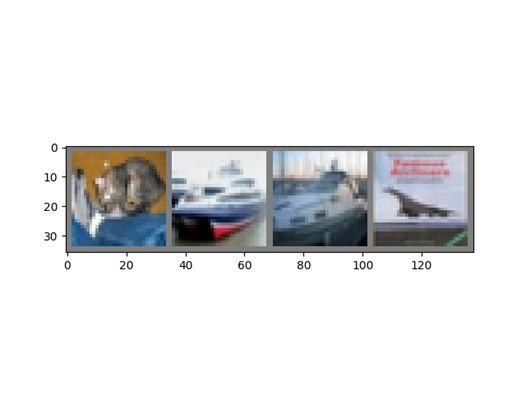
好的,第一步,让我们从测试集中显示一张图像来熟悉它。
dataiter =iter(testloader)images, labels = dataiter.next()

# 打印图片
imshow(torchvision.utils.make_grid(images))

print('GroundTruth: ', ' '.join('%5s'% classes[labels[j]] for j inrange(4)))
图片三
输出:
GroundTruth: cat ship ship plane
现在让我们看看神经网络认为这些样本应该预测成什么:
outputs = net(images)
输出是预测与十个类的近似程度,与某一个类的近似程度越高,网络就越认为图像是属于这一类别。所以让我们打印其中最相似类别类标:
_, predicted = torch.max(outputs, 1)

print('Predicted: ', ' '.join('%5s'% classes[predicted[j]]

                              for j inrange(4)))
输出:
Predicted: cat car car ship
结果看起开非常好,让我们看看网络在整个数据集上的表现。
correct =0total =0with torch.no_grad():
    for data in testloader:
        images, labels = data
        outputs = net(images)
        _, predicted = torch.max(outputs.data, 1)
        total += labels.size(0)
        correct += (predicted == labels).sum().item()

print('Accuracy of the network on the 10000 test images: %d %%'% (
    100* correct / total))
输出:
Accuracy of the network on the 10000 test images: 53 %
这看起来比随机预测要好,随机预测的准确率为10%(随机预测出为10类中的哪一类)。看来网络学到了东西。
class_correct =list(0.for i inrange(10))class_total =list(0.for i inrange(10))with torch.no_grad():

    for data in testloader:
        images, labels = data
        outputs = net(images)
        _, predicted = torch.max(outputs, 1)
        c = (predicted == labels).squeeze()

        for i inrange(4):
            label = labels[i]
            class_correct[label] += c[i].item()
            class_total[label] +=1

for i inrange(10):

    print('Accuracy of %5s : %2d %%'% (
        classes[i], 100* class_correct[i] / class_total[i]))
输出:
Accuracy of plane : 52 %
Accuracy of   car : 73 %
Accuracy of  bird : 34 %
Accuracy of   cat : 54 %
Accuracy of  deer : 48 %
Accuracy of   dog : 26 %
Accuracy of  frog : 68 %
Accuracy of horse : 51 %
Accuracy of  ship : 63 %
Accuracy of truck : 60 %
所以接下来呢?我们怎么在GPU上跑这些神经网络?
三、 在GPU上训练
就像你怎么把一个张量转移到GPU上一样,你要将神经网络转到GPU上。
如果CUDA可以用,让我们首先定义下我们的设备为第一个可见的cuda设备。
device = torch.device("cuda:0"if torch.cuda.is_available() else"cpu")

# 假设在一台CUDA机器上运行,那么这里将输出一个CUDA设备号:
print(device)
输出:
cuda:0
本节剩余部分都会假定设备就是台CUDA设备。接着这些方法会递归地遍历所有模块,并将它们的参数和缓冲器转换为CUDA张量。
net.to(device)
记住你也必须在每一个步骤向GPU发送输入和目标:
inputs, labels = inputs.to(device), labels.to(device)
为什么没有注意到与CPU相比巨大的加速?因为你的网络非常小。
练习:尝试增加你的网络宽度(首个nn.Conv2d参数设定为2,第二个nn.Conv2d参数设定为1–它们需要有相同的个数),看看会得到怎么的速度提升。
目标:
-
深度理解了PyTorch的张量和神经网络
-
训练了一个小的神经网络来分类图像
四、 在多个GPU上训练
如果你想要来看到大规模加速,使用你的所有GPU,请查看:数据并行性(https://pytorch.org/tutorials/beginner/blitz/data_parallel_tutorial.html)。
五、 接下来可以学哪些?
-
训练神经网络玩电子游戏(https://pytorch.org/tutorials/intermediate/reinforcement_q_learning.html)
-
在imagenet上训练最优ResNet网络(https://github.com/pytorch/examples/tree/master/imagenet)
-
使用生成网络来训练面部生成器(https://github.com/pytorch/examples/tree/master/dcgan)
-
使用周期性LSTM网络训练一个词级(word-level)语言模型(https://github.com/pytorch/examples/tree/master/word_language_model)
-
更多例子(https://github.com/pytorch/examples)
-
更多教程(https://github.com/pytorch/tutorials)
-
在论坛上讨论PyTorch(https://discuss.pytorch.org/)
-
在Slack上与其他用户交流(https://pytorch.slack.com/messages/beginner/)
脚本总运行时间:(9分48.748秒)
下载python源代码文件:cifar10_tutorial.py(https://pytorch.org/tutorials/_downloads/ba100c1433c3c42a16709bb6a2ed0f85/cifar10_tutorial.py)
下载Jupyternotebook文件:cifar10_tutorial.ipynb
(https://pytorch.org/tutorials/_downloads/17a7c7cb80916fcdf921097825a0f562/cifar10_tutorial.ipynb)

你也许还想看:
● 圣诞有礼 | 送免费公开课+机器学习+CV经典书籍共 14 本
欢迎扫码关注:
原创文章,作者:fendouai,如若转载,请注明出处:https://panchuang.net/2018/12/27/7463ccb1e1/


